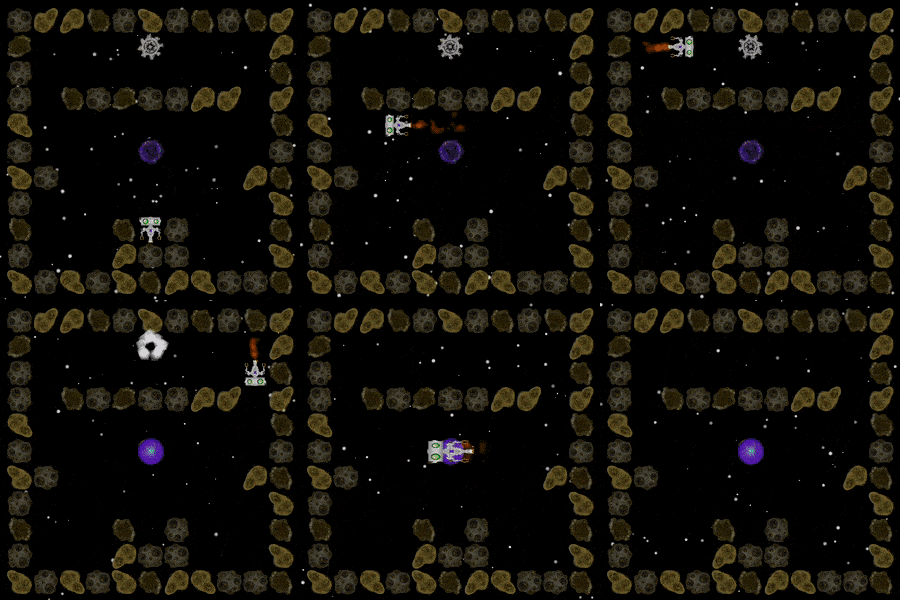
One of the trickiest parts of building Jetsam thus far has been conveying the game’s core concepts through our level design.
For those of you not in the know, Jetsam is a 2D puzzle game with a simple user interaction forming the game’s core gameplay loop – swipe in a direction, and Jetsam will move indefinitely in that direction until he collides with something that stops him.

But things get more complicated, quickly. See that gear in the gif above? Jetsam has to collect it. And on every level, he has to then proceed forward to our exit – the purple circle you can also see. That exit is not “active” until the gear is collected.
How on earth do you convey ALL OF THAT to the player without being obnoxious in your tutorial?
We opted for something a little devious – breaking our teaching out into two levels, and focusing on different things in each. Let’s break down the first learner level’s structure a bit to explain.

Despite Learner Level 1 taking on the standard 9×9 grid size, Jetsam is physically restricted to the positions marked by squares in the screenshot above. He cannot move elsewhere, even though he can technically “travel across” a lot of the tiles. By starting him in the middle of the lower 3×9 rectangle, we open up some other movement options for him – that way the player doesn’t feel as restricted as they actually are.
The level design reaches a critical point in the right column. Jetsam can move relatively freely through the bottom portion of the level, but if he wants to move anywhere else, he must move upward in the right column. This chokepoint is intentional – no matter what inputs the player makes, they will ALWAYS collect the gear when they move to the upper part of the level, learning that it is collectible and safe to pass through in the process.
From there, we’ve made Jetsam’s possible positions entirely linear – we don’t want to try to teach too much in one sitting! After collecting the gear, he lands in the top right corner. His only options from there are to either go back the way he came, or go left to the top left corner. From there, the linearity is pretty self-explanatory – he eventually ends up on the purple tile, successfully completing the level, which gives the player some positive feedback for figuring out what’s going on.
But does the player really understand the cause-and-effect relationship between collecting the gear and exiting the level on the purple tile? Probably not – hence, Learner Level 2.

The philosophy here builds upon the technique used in Learner Level 1 – restricted movement, a chokepoint, and an intended teaching.
In this case, we want the player to learn that simply passing through the exit prior to collecting the gear will not complete the level – the act of collecting the gear actually “activates” the exit. The easiest way to teach that? Make the player pass through the unactivated exit!
The player’s immediate “wtf” reaction when the level isn’t complete on the first up swipe is designed to set up for an Aha! moment (those critical moments in puzzle games where the player learns something), in this case the realization that grabbing the gear activates the exit. By segmenting the upper part of the level, we call attention to the separateness of the gear and the exit, hopefully prompting that lightbulb to come on when they grab the easily-positioned gear. Then, it’s only a matter of time until they revisit the exit’s location and successfully complete the level (ideally they will also notice that the exit looks different the moment they collect the gear, but that isn’t necessary for their training to be complete).
Structure-wise, this level foregoes an opening “free movement” section and opens straight into the chokepoint – the reason being that it builds on the past level, and we don’t want our player to get distracted and forget about what they learned in Learner Level 1 upon starting this one (they are meant to be played in sequence, after all). However, they are free to conquer the top section of the level in multiple ways – restoring their feeling of freedom for a short spell. By carefully stitching together linear and free-moving sections, the tutorial feels less like a tutorial and more like a playground.
And so, two easy levels teach three rules:
- The gear is collectible
- The purple blob is the level exit
- The exit doesn’t turn on until you’ve collected the gear
Success! We’ve taught our player how to navigate our somewhat-complicated game, and never issued a single text prompt to tell them anything directly. They got to figure it out themself – and that’s what you want in a puzzle game. Hopefully what we’ve learned from tuning our game can help you tune yours – and you can design some kick-ass learner levels that help convert players who download your game into players who finish it.
If you liked this blog post, follow us on Twitter and check back regularly here for updates. If you have an iOS device, sign up for our iOS TestFlight Beta here. We can’t wait to test our design and puzzlecraft with a wider audience, and would love for you to be part of it.
2 thoughts on “Jetsam #3: Learner Levels – How to Train Your Player”